I posted about this on my FB but figured I’d add a more permanent post. This density tower using everyday liquids experiment worked out so well. It was fun to set up and fun to test. The best part is that we didn’t have to buy anything. All of the liquids in this density tower are ones we have in our kitchen on a regular basis.
I am a huge fan of STEM (Science, Technology, Engineering, Math) activities. Some of ours work out better than others. It’s important for kids to learn that even if an experiment doesn’t go right, it was still worth doing. When something fails, we discuss the results anyway, what we were expecting and what went wrong. We try to use the right language (words like hypothesis and reaction) so that our kids can be comfortable with scientific vocabulary when the times comes. We try to use the right equipment – we have a toy microscope and we regularly use test tubes and pipettes. Kids are thrilled to have a chance to use “real” tools.
This density tower using everyday liquids was a very successful experiment and it’s really easy to do. Get your child to find objects made of various materials to see which layer of liquid they will settle on. It’s helpful to use a flashlight (a light table might work too) since some of these liquids aren’t translucent enough to see through. Keep in mind that most of the liquids in this density tower are water-based so you need to be gentle when pouring them to avoid mixing them up.
Density Tower with everyday liquids step by step guide:
- Gather the objects you plan to drop. Make sure that you have a variety of shapes and materials. We used a couple grapes, cherry tomatoes, metal bolts, plastic buttons, a rock, and a plastic egg.
- You will need a clear container. A vase or a decanter of some sort would work. Make sure it’s easy to wash after.
- You will need a turkey baster and/or tablespoon for adding the liquid layers gently on top of each other without disturbing the ones underneath
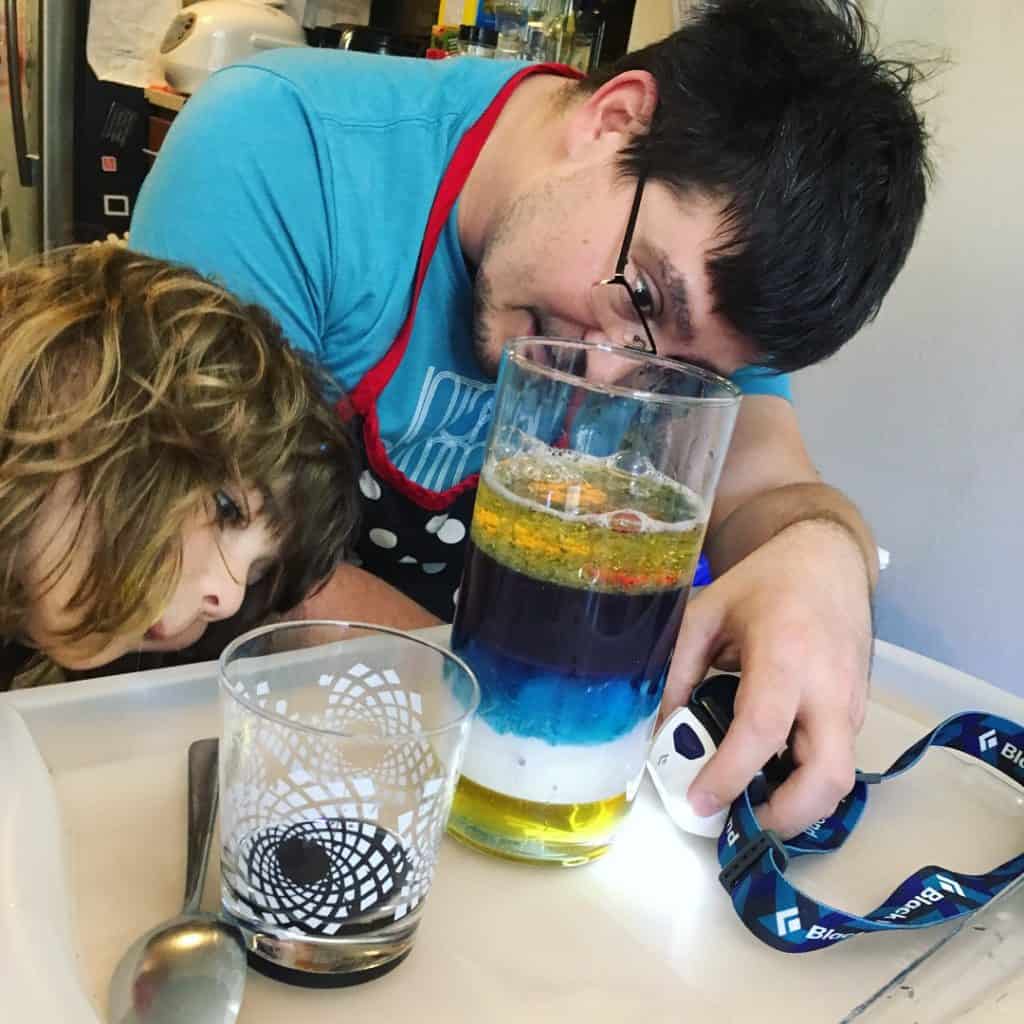
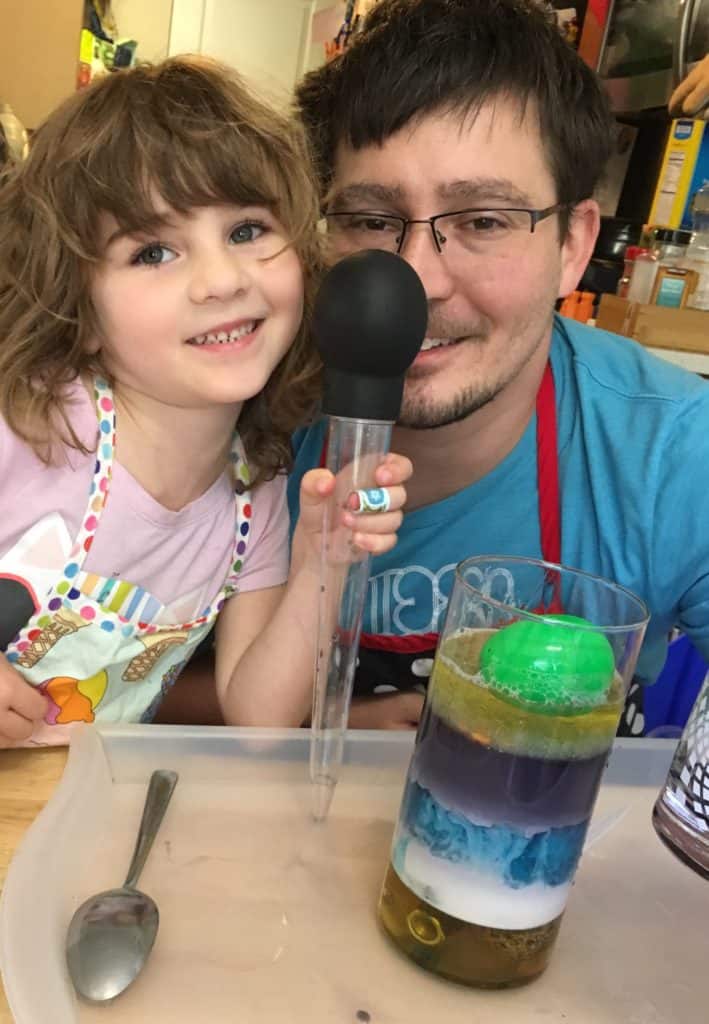
- Gather about 1/3-1/2 cup of each of the following liquids: honey, milk, dish soap, water (with food colouring if you wish) and oil. As you can see from the picture, the dark purple layer is the water. Lulu may have added a bit too much food colouring to it.
- Assemble your tower: Start with honey and add the liquid layers in the order mentioned above, ending with the oil. Honey is the densest of the liquids, oil is the least dense. The easiest way to add the liquids is to fill up a turkey baster and pour it onto the side of the container you’re using. However you need to clean the turkey baster in between the different layers. Another way is to pour over a spoon held convex side up. This is a bartender trick I’ve seen in bars to make layered cocktails. You can google for how to do this.
- Once all the layers are in place, drop the objects into the tower one by one and watch where they settle down.
Density Tower with everyday liquids results:
I was actually really surprised that the different objects consistently landed and stopped on the same layers in the density tower. When I was researching and setting it up a part of me expected it to be a flop where everything just drops to the bottom or floats on top. But we managed to see the different liquids holding their own.
I would advise dropping the really dense objects (metal bolts, rock) towards the end because they cause the most disturbance between the liquid layers.
The results we had were as follows:
- The plastic buttons landed on top of the water layer (the purple thing) and at the bottom of the oil. Plastic buttons float on water but not oil.
- The cherry tomatoes stopped at the bottom of dishwashing liquid layer on top of the milk
- The grapes stopped in the milk layer on top of the honey
- The metal bolts and the rock, unsurprisingly, sunk all the way to the bottom FAST
- The plastic egg full of air floated on top of the oil.
Overall I’m happy with those results. They were consistent, we have multiples of the tomatoes, buttons and grapes and they landed in the same liquids as each other. I wish we had found something that would stop in the water layer on top of the soap but none of the objects in our experiment did. If you do this activity and discover what would float on top of dishsoap, leave a comment below. I want to find out!
Experiment Follow-up:
Want even more? Here are some suggestions for a follow up about this experiment
- Discuss (or try it out for yourself) what would happen if you had poured the oil layer first. Since it is the least dense and does not mix with water-based liquids, it would still have risen up to the top eventually. But it would have disturbed the other liquids in the tower.
- Find out what would happen if you stir or mix the density tower (after you’re finished your experiment)? Since there is dishsoap in the mix, you should be able to stir all of the liquids into a uniform (homogeneous) mixture. However, if you were to try this without the soap, you should see the oil separating. This is a lead in to discuss immiscible liquids (those whose molecules will not stick together) and the properties of soap, whose molecules are attracted to both water and oil thus enabling them to mix.
Hope you enjoyed this STEM activity! Let me know in the comments what other STEM activities can be easily done at home with simple household items. Looking for more at home STEAM activities? Check out this post on making green slime.
We love these kinds of experiments because at this age kids learn mostly though play. Read more about why play is important in the early years.


I’m definitely going to try this! Looks like a fun learning experience for the little ones.
Love this S.T.E.M activity – what ages would you recommend it for?
my daughter was 4.5 when we did this. She definitely enjoyed the activity. I think any age after 4 would be great, older kids can delve into the actual science more. Even Husband enjoyed himself 🙂
Aww I love this, I think we will have to add this to summer activities my 5 year old
What a really fun project to do! I know my son would love it!
This is such a cool activity! I love projects that are fun, but also teach lessons.